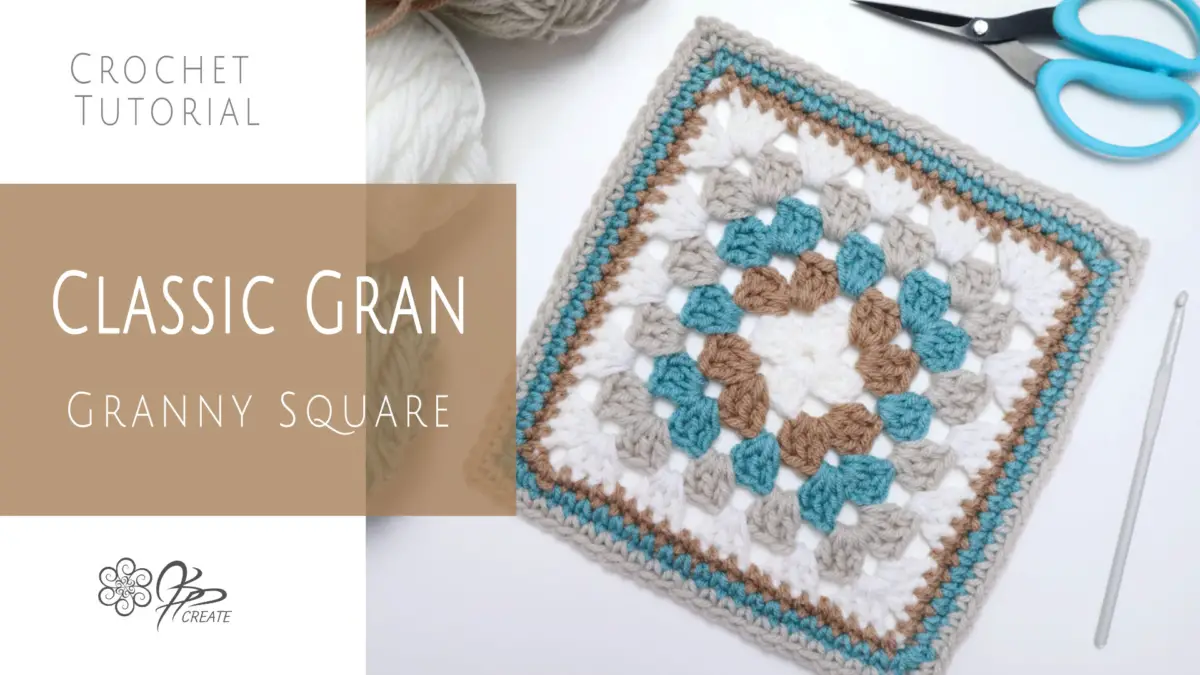
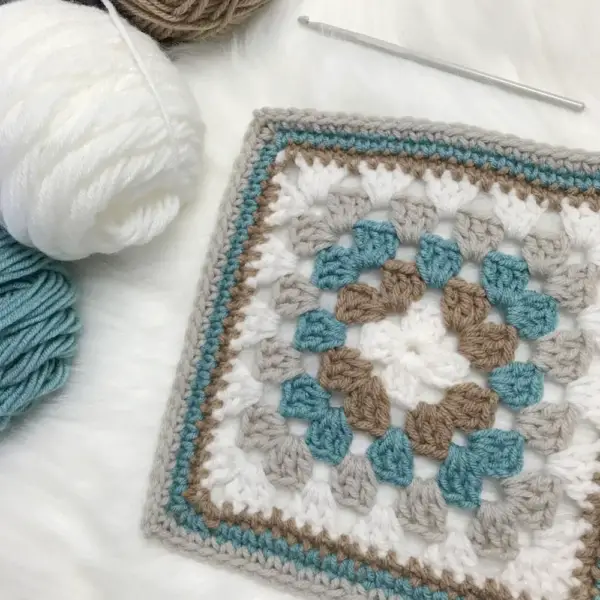
This is the Best Beginner Granny Square. No Granny Square collection is complete without your Classic Granny Square. So today we learn how to make the square I call The Classic Gran.
This motif is the one you think of most often when you hear the term Granny Square. You have probably seen this one in everything from blankets, home decor and to trendy cardis and handbags.
Once you get the simple stitch pattern down for this one, you will be creating them in every colour. Let’s get crocheting the best beginner granny square, The Classic Gran.
About this Free Series
This Free series of Granny Square patterns has evolved from my love of playing with shapes and colours through crochet and a desire to find a way to keep track of my patterns and charts. I thought it would be fun to create this little series of tutorials to share with all of you.
I enjoy trying different combinations of simple crochet stitches and using “scrap” yarn to make motifs. Actually, I confess it isn’t scrap, I just enjoy picking up single balls of yarn on purpose, every time I am near yarn stores, or online, or wherever I see yarn!! Because I really want to know just how many different shades of yellow truly exist!
I also plan to create some projects using these squares, so stay tune for that as well. If you want to stay in touch and keep up on my newest ideas as they come out, you can join my crochet email list below. I would love to have you aboard.
A Quick Note on Names:
I love to experiment with stitches, so it is possible these squares may look similar to others seen on the web or in pattern books, mostly they just come from me playing around with my hook and some yarn, and for that reason, I give them my own names. I’m am just sharing what comes through me and hopefully adding my own personal touch to the wonderful selection of ideas already out there.
Supplies and Materials
Sample is worked with a 4.5mm (US 7 )crochet hook
Finished square = 8″ x 8″
Medium Weight (size 4) Yarn.
Yarn Used in Sample Colour Way:
A – Soft White – col 0316 – Super Saver by Red Heart
B – Soft Taupe – col 01011 – Impeccable by Loops and Threads
C – Arctic – col VS144 – Crafts Smart Value Yarn by Loops and Threads
D – Putty – col 01750 – Impeccable by Loops and Threads
More Information on Hooks Sizes, Yarn Weights and Crochet Language
Hook Sizes see the Craft Yarn Council’s Page Here
For Standard Yarn Weight Information See this Page
A Handy PDF from Annie’s on the difference between UK and US Crochet Terms
A Nice Explanation from LoveCraft’s on The UK and US differences

Crochet Abbreviations:
ch – chain
st – stitch
sts – stitches
sl st – slip stitch
sc – single crochet
dc – double crochet
rnd – round
rep – repeat
Col – Yarn Colour (followed by the letter of Colour stated in Sample Yarn Used section above)
Crochet Pattern Instructions for The Best Beginner Granny Square
Check out the video tutorial below for a walkthrough of the making of the square.
Symbol Chart for The Best Beginner Granny Square
In this chart I alternate between two colours for each row. This is so that you can tell which stitches belong to that row. The colours do not represent the colourway I use in the Sample. You will find the Colour Way Chart for the sample I worked, further down in this post.

Chart Key

Foundation:
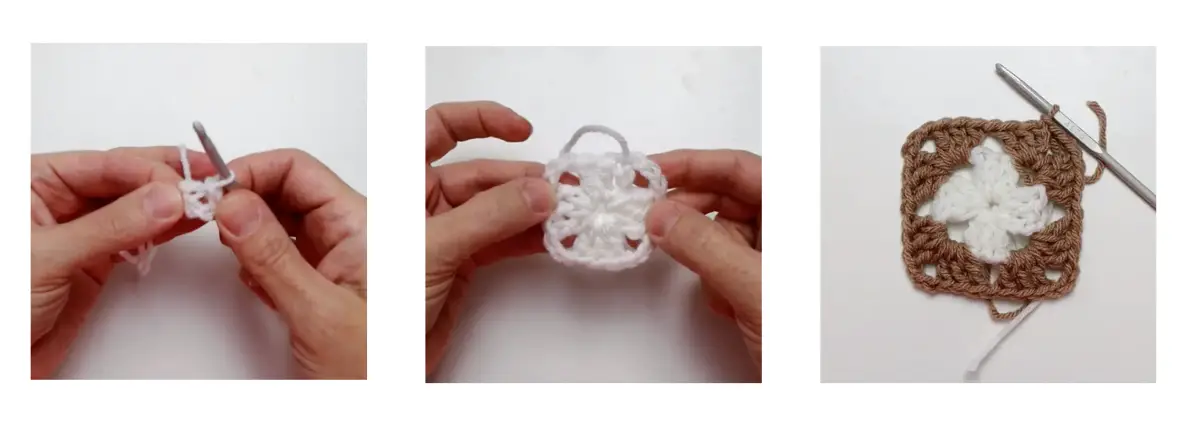
With Col A, Ch 4 and join with a sl st in first ch to form a loop.
Round 1:
Working all sts into centre of ch 4 loop, Continue with Col A, Ch 3 ( counts as dc ), 2 dc, * ch 3, 3 dc, rep from * two more times, ch 3, sl st in 3rd ch of Starting ch-3, fasten off { 4 sets of 3-dc, 4 ch-3 sp }
Round 2:
Join Col B, with a sl st in any ch-3 sp (corner) of previous rnd, ch 3 ( counts as dc ), 2 dc in same ch-3 sp as join, * ch 1, sk next 3 dc, [ 3 dc, ch 3, 3 dc ] into next ch-3 sp, rep from * two more times, ch 1, skip next 3 dc, 3 dc in same ch-3 sp as join, ch 3, sl st in 3rd ch of Starting ch-3, fasten off. { 8 sets of 3-dc, 4 ch-3 sp, 4 ch-1 sp }
Round 3:
Join Col C with a sl st in any ch-3 sp (corner) of previous rnd, Ch 3 ( counts as dc), 2 dc into same ch-3 sp as join, * ch 1, skip next 3 dc, 3 dc into next ch-1 sp, ch 1, skip next 3 dc, ** [ 3 dc, ch 3, 3 dc ] into next ch-3 sp (corner), rep from * two more times, then work from * to ** once more, 3 dc into same ch-3 sp as join, ch 3, sl st in 3rd ch of Starting ch-3, fasten off. { 12 sets of 3-dc, 4 ch-3 sp, 8 ch-1 sp }
Round 4:
Join Col D with a sl st in any ch-3 sp (corner) of previous rnd, Ch 3 ( counts as dc), 2 dc into same ch-3 sp as join, * ( ch 1, skip next 3 dc, 3 dc into next ch-1 sp ) twice, ch 1, skip next 3 dc, ** [ 3 dc, ch 3, 3 dc ] into next ch-3 sp (corner), rep from * two more times, then work from * to ** one more time, 3 dc into same ch-3 sp as join, ch 3, sl st in 3rd ch of Starting ch-3, fasten off. { 16 sets of 3-dc, 4 ch-3 sp, 12 ch-1 sp }
Round 5:
Join Col A with a sl st in any ch-3 sp (corner) of previous rnd, Ch 3 ( counts as dc), 2 dc into same ch-3 sp as join, * ( ch 1, skip next 3 dc, 3 dc into next ch-1 sp ) three times, ch 1, skip next 3 dc, ** [ 3 dc, ch 3, 3 dc ] into next ch-3 sp (corner), rep from * two more times, then work from * to ** once more, 3 dc into same ch-3 sp as join, ch 3, sl st in 3rd ch of Starting ch-3, fasten off. { 20 sets of 3-dc, 4 ch-3 sp, 16 ch-1 sp }

Round 6:
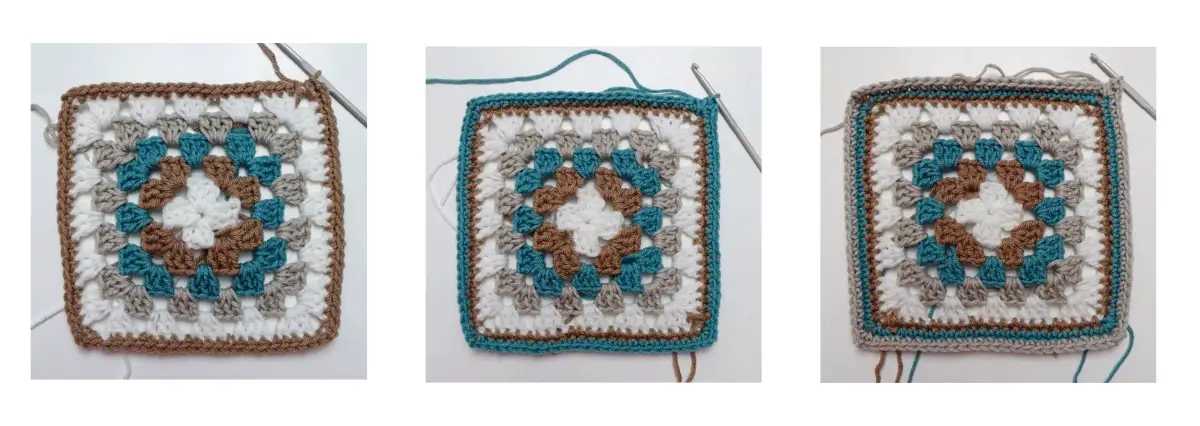
Join Col B with a sl st in any ch-3 sp (corner) of previous rnd, ch 1, * ( sc in each of next 3 sts, sc in next ch-1 sp ) four times, sc in each of next 3 sts, [ sc, ch 2, sc ] into next ch-3 sp (corner), rep from * three more times, sl st in first sc of rnd, fasten off. { 84 sc, 4 ch-2 sp }
Round 7:
Join Col C with a sl st in any ch-3 sp (corner) of previous rnd, ch 1, * sc in each of next 21 sts, [ sc, ch 2, sc ] into next ch-3 sp ) corner, rep from * three more times, sl st in first sc of rnd, fasten off. { 92 sc, 4 ch-2 sp }
Round 8:
Join Col D with a sl st in any ch-3 sp (corner) of previous rnd, ch 1, * sc in each of next 23 sts, [ sc, ch 2, sc ] into next ch-2 sp ) corner, rep from * three more times, sl st in first sc of rnd, fasten off. { 100 sc, 4 ch-2 sp }
Follow along and I will walk you through the Basics for the best beginner granny square, step by step.
Watch The Classic Gran Tutorial
Sample Colour Way Symbol Chart – The Best Beginner Granny Square
In this chart I have made all stitch symbols in one colour and have changed the background colour of each row to represent the Colour Way I used in this tutorial. Unlike the previous chart above, where the symbol colours are different for each row, I keep all the symbols one colour in this chart so that it isn’t too confusing when trying to follow the specific Colour Way.

Thanks for joining me and getting creative.
“I found I could say things with color and shapes that I couldn’t say any other way – things I had no words for.” – Georgia O’Keeffe

