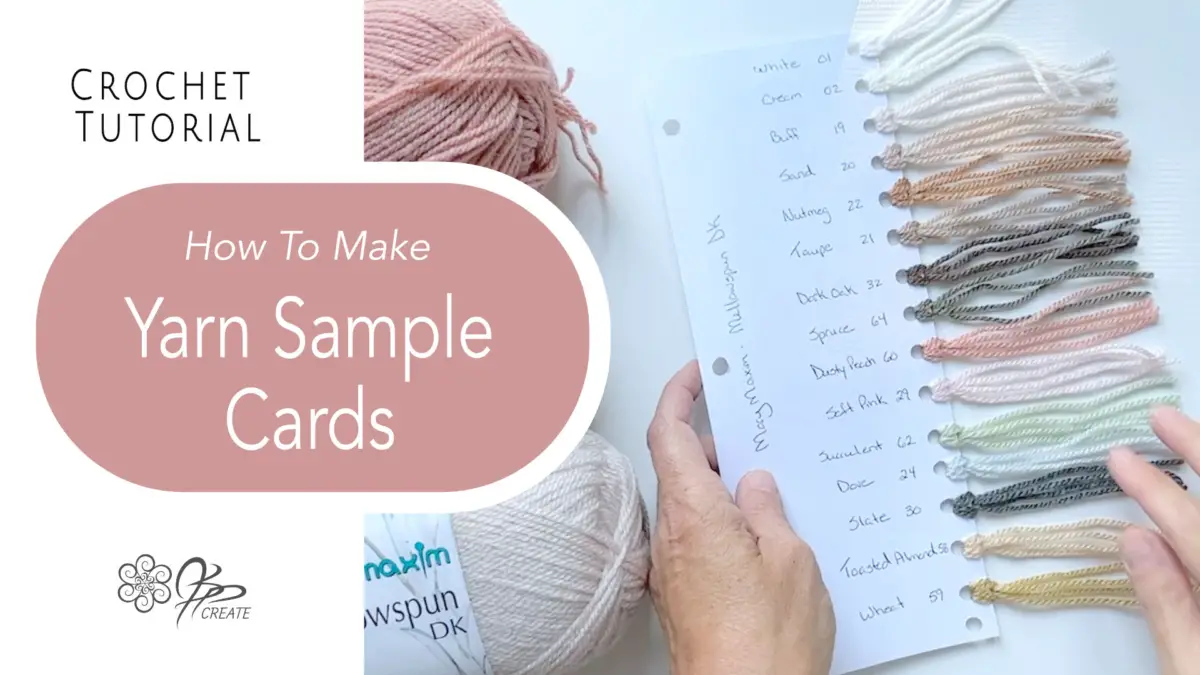
Looking to improve your yarn stash management? Well, you’re in the right place! Join me in this tutorial where I will share with you how I create my own yarn sample cards from just a few simple office supplies you probably have lying around your house.
These cards are a fantastic solution for streamlining your yarn stash organization. They are not just fun and pretty to make; they’re practical tools, that can save you valuable time when selecting your next project’s colours. Kind of like yarn cheat sheets!
With these at your fingertips, you’ll effortlessly keep track of your favourite yarns, and keep all the info you need on them, in one place. Say goodbye to guesswork and hello to a more organized and efficient crafting experience.
For a detailed, step-by-step guide, make sure to scroll down and check out the full video tutorial below. Feel free to follow along with me as we go through the entire process together.
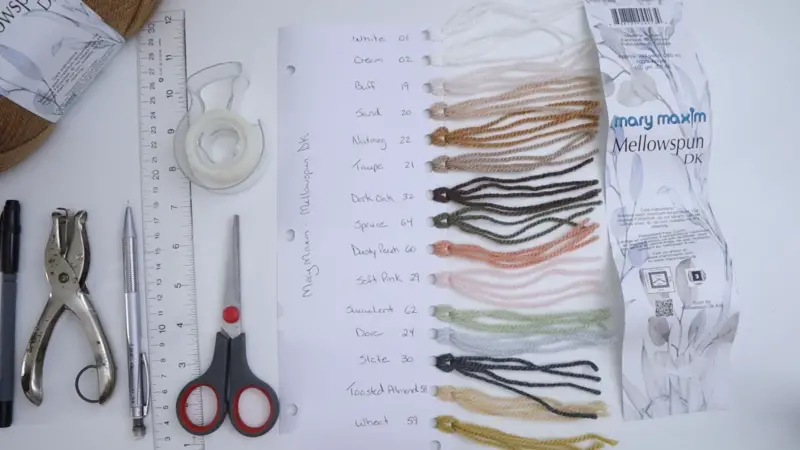
Supplies to Make Your Yarn Sample Cards
- Ruler
- Scissors
- Pencil
- Pen
- Hole Punch ( 3 hole for the cards is handy but single is better for the yarn holes )
- 8 1/2″ x 11″ Paper or Card Stock
- Tape
Why Yarn Sample Cards
During my time as the owner of a yarn store, one of the highlights of receiving packages from my yarn suppliers was the binders filled with yarn sample cards. I would spend hours flipping through them and they were an invaluable tools for my design work, especially when I needed to work out new color palettes for various projects. These days, I’ve taken to creating my own yarn sample cards, tailored to the yarns in my stash and the ones I frequently use.
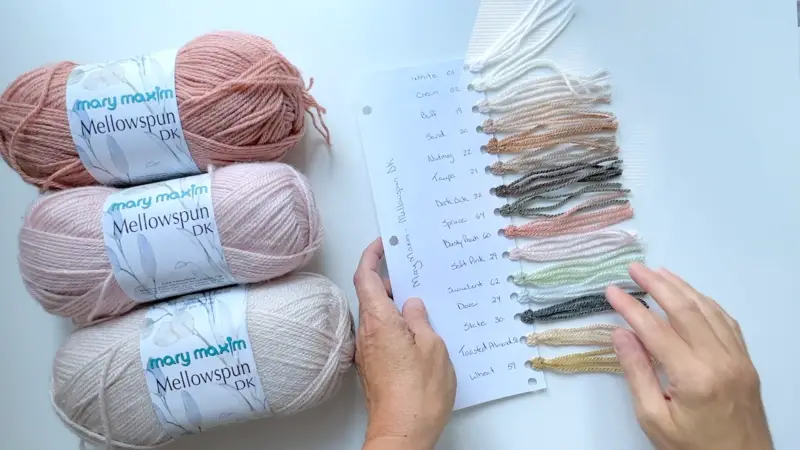
This practice has streamlined my creative process significantly. Now, at a quick glance, I can easily spot the colors I want to incorporate into my projects and easily access the information like yarn weight, yardage, recommended hook sizes, and gauge. Additionally, it allows me to compare colors effortlessly, aiding in my decision-making. What’s more, if I happen to run out of a particular yarn, these cards come to the rescue by providing the color name and number, making it a breeze to reorder.
Another reason I’ve love these sample cards is they really help me in identifying yarn when things get a bit chaotic, which is a common occurrence in my crafting space. These cards have become my trusty companions for rescuing those “lost” balls of yarn that are hanging out in my yarn shelves, or project bins, or under my chair!
Setting Up Your Yarn Sample Cards
- Start by taking your sheet of paper and folding it lengthwise in half. ( If you are using card stock you can cut the piece in half lengthwise )
- If you have a 3 hole punch you can simply punch the longside to fit your binder
- Make sure you are going to punch the holes on the open side of the folded paper, NOT the folded edge
- If you have a single hole punch you will want to mark your holes first, by placing your paper longside to the rings and putting a pencil mark for each one
- Then you want to measure in about 1″ from the edge, to indicate the inner edge of your punch hole
- Go ahead and punch the 3 holes now into your card

Setting Up Yarn Holes on The Sample Cards
- Using your ruler, mark the number of holes you want for your yarn sample card along the folded edge. I suggest 11 holes, I mark the first one 1/2″ in from the top edge and then 1″ apart. Be careful not to place the holes to close together or they may tear.
- Using your ruler draw a line 1/2″ in from the folded long edge to mark the where the hole punch edge will be.
- punch all your holes, as evenly as possible

Labeling your Yarn Sample Cards
Once all your holes are punched, and before we start using the card, I suggest you use this “template” card to make more of them. This way you have extra and you don’t have to go through the measuring process again.
Next step is to add some information to the card before we get started adding the yarn.
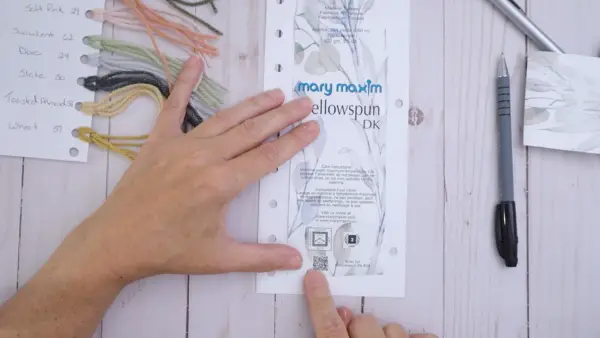
Write your Yarn Name on the front of the card. You can add more information here as well, but I prefer to take a full yarn label and tape it to the back of the card. This way you have all the information on the yarn you need in one place, including content, weight, yardage, washing instructions and some labels even have QR codes. Be sure when you tape your label on, you do not tape over any of the holes you punched.
Now you are ready to start adding your yarn.
Adding your Yarn to the Cards
Start adding the yarn you have in your stash, and then you can add any new colours as you get them.
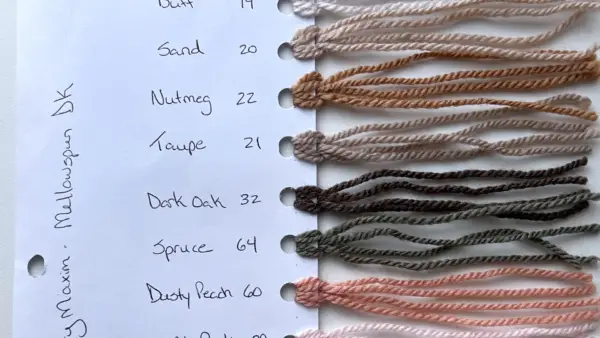
Organizing how the yarn is on each card is up to you. You can do it by colour names, or you can just add them randomly. I like to check out the yarn company’s website and list all the colours I have and will want in an order that is aesthetically pleasing to me. It makes it easier when I am choosing colour palettes. You can add the names of yarns you do not yet have and just leave the holes blank for now.
To add the yarn, I cut two 12″ strands, fold them in half and loop them on with a knot, as you would do with fringe. I then cut them to 4″ to keep them neat and even.
Then you can write in the colour name and colour number

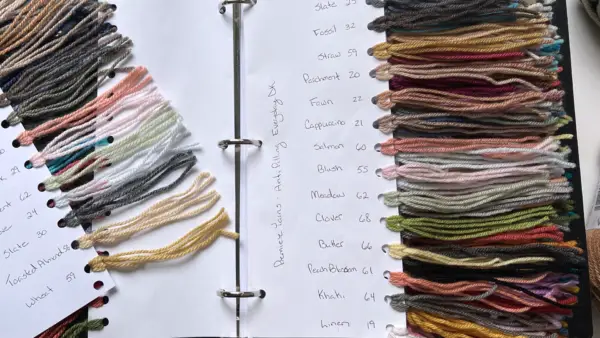
Make A Yarn Binder
That is all there is to it. Now you can fill an entire binder of yarn sample cards, and have fun flipping through it, dreaming of new projects and colour palettes.
Watch the tutorial below and join me as I work through making a card from beginning to end.
Thanks for joining me and getting creative.
“I found I could say things with color and shapes that I couldn’t say any other way – things I had no words for.” – Georgia O’Keeffe

