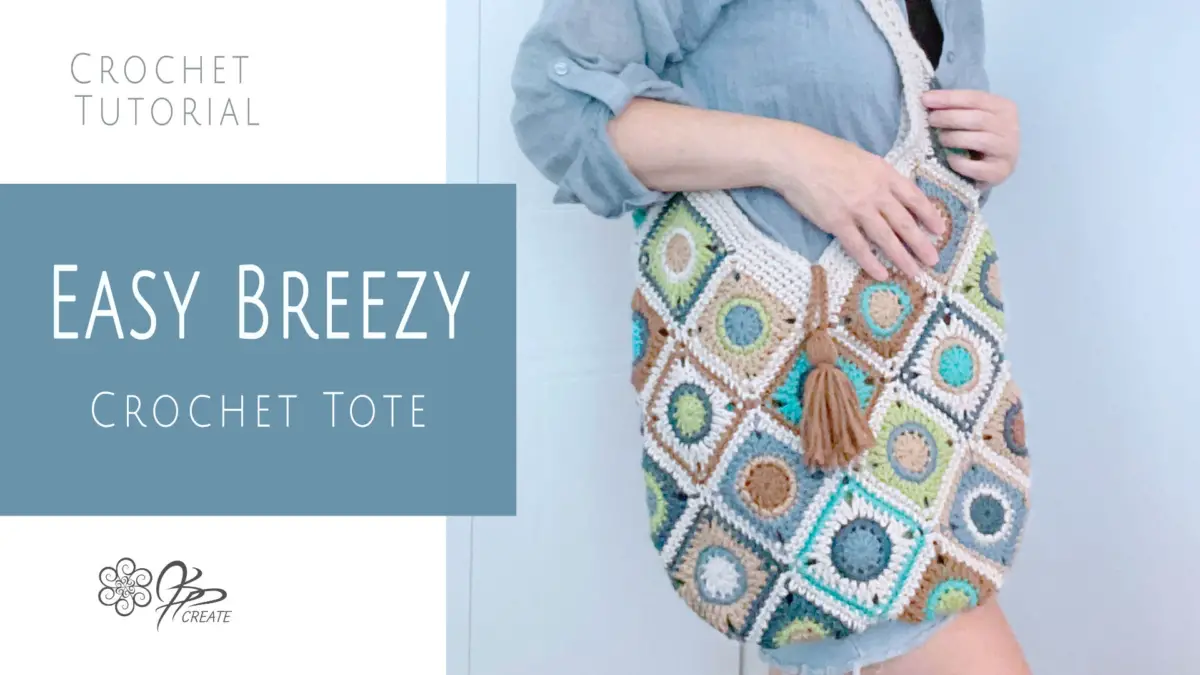
Making a crochet tote is a quick and fun way to showcase your granny squares. This Easy Breezy Crochet Tote is made using a simple granny square, to make a beautiful and useful carry all.
In this post I am going to share how to use this square to make a large version of this tote, AND I will also share how you can adapt this bag using a square of your own choosing to make one of these awesome little totes.
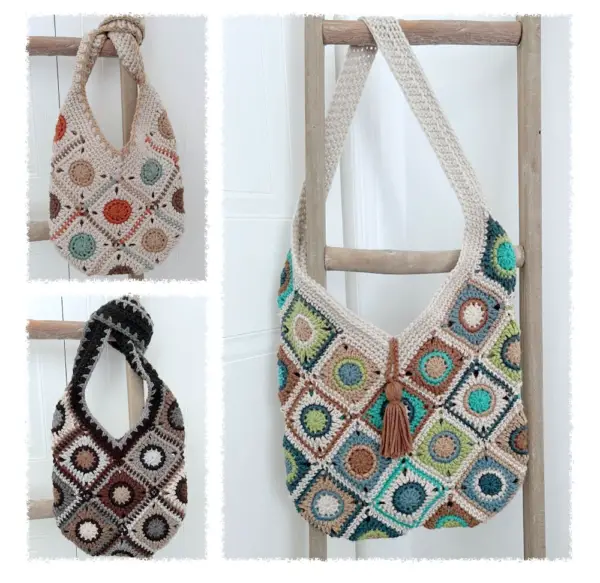
This crochet tote can be made in two different sizes. Below you will find the layout diagrams, as well as the chart sizing for the size of square you are using.
I will briefly go over the basics on how to assemble your tote below, but the full video tutorial below will walk you through the entire process. So be sure to scroll down and watch it. Then you can work through it along with me.
If you would like a printable PDF of this pattern, you can purchase it in my Pattern Shop here:
JSPCREATE Pattern Shop: Easy Breezy Crochet Tote Pattern
Crochet Tote Sizes
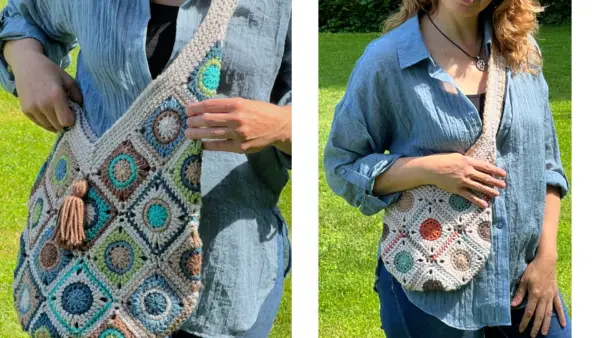
This tote bag can be made in two sizes. The large size is great for shopping, a trip to the beach or carrying your latest crochet WIP. The small tote is great for a purse, a small cross body carry all, or even great for a tote for a small child.
These crochet totes are great for gifts or to have on hand for shopping trips or travel trips. They are trendy and fashionable and are great for using up all your wonderful leftover yarn.
Supplies Used In The Easy Breezy Crochet Tote
Yarn: Med weight size 4 / Worsted Weight
Hook: 5.00 mm US 8 / H
Other Supplies:
Scissors, Yarn needle for darning in ends
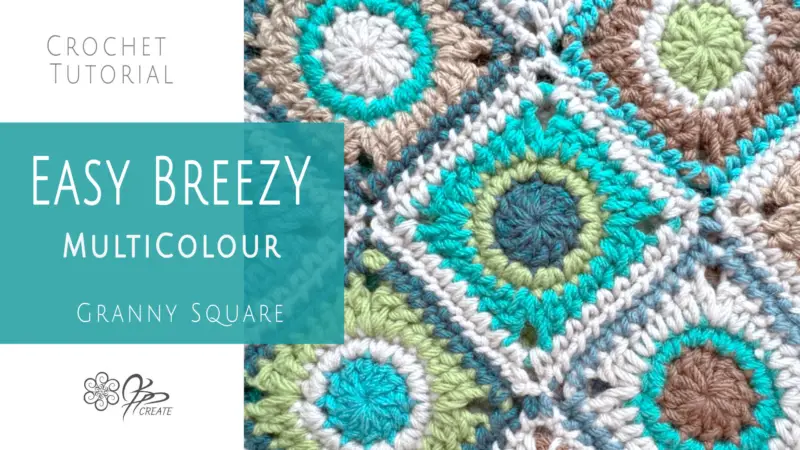
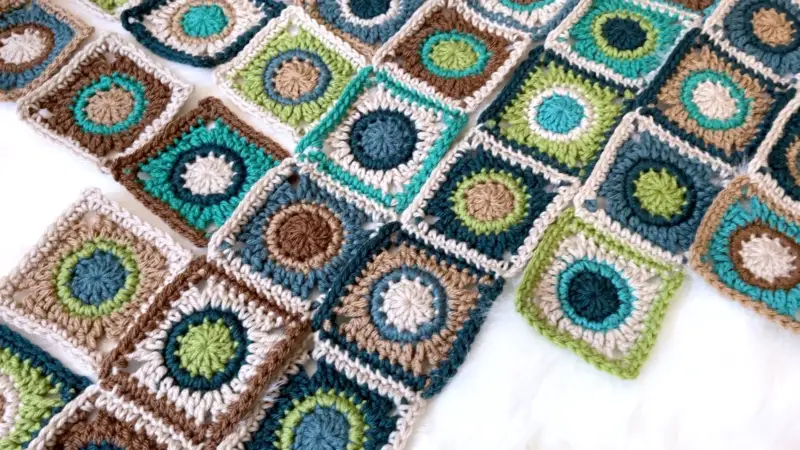
I made this tote using my Easy Breezy Square Multicolour Version. The Large Tote calls for 32 squares.
The tutorial for this square is Here
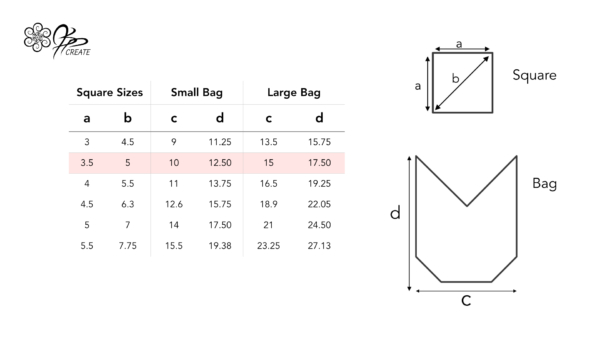
Below I have included a Crochet Tote Bag sizing chart which will let you use any square shaped, granny square of similar size to make this tote.
More Information on Hooks Sizes, Yarn Weights and Crochet Language
Hook Sizes see the Craft Yarn Council’s Page Here
For Standard Yarn Weight Information See this Page
A Handy PDF from Annie’s on the difference between UK and US Crochet Terms
A Nice Explanation from LoveCraft’s on The UK and US differences
Tote Bag Sizing – Adapt for Your Own Granny Square
This Tote can be made with most any crochet square pattern. Below I have worked out a size chart to determine how big your tote bag will be depending on the size of the square you will be using. The Pink Highlight on the Chart is the Size of Square I am using in my Sample
The Key measurement for the square is the diagonal ( b) measured from corner to corner. The side measurements ( a ) are technically the measurements that will give you the diagonal measurement ( b ) in the chart.
From here you can determine how large the finished bag will be dependant on your square size.
Both Large and Small size layouts are included. This is just a guide, so be sure to try your squares in the layout to see if you like the results.
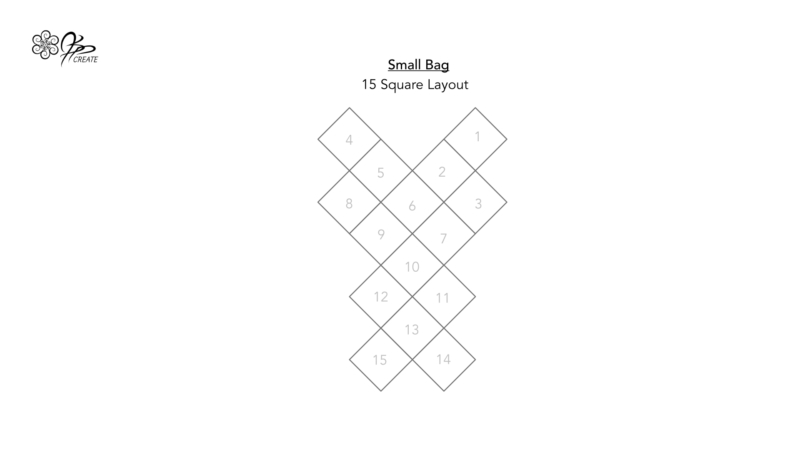
Layout Diagrams for Small Crochet Tote Bag
This tote can be done in two sizes, Small and Large ( see sizing chart ). So first thing after making your squares is to lay them out for sewing. The Small Tote calls for 15 squares. The Squares in the layout below are numbered from 1 to 15, in order of how I sew them.
I find it easiest to sew the squares in strips first, and then sew the strips together to form one complete piece
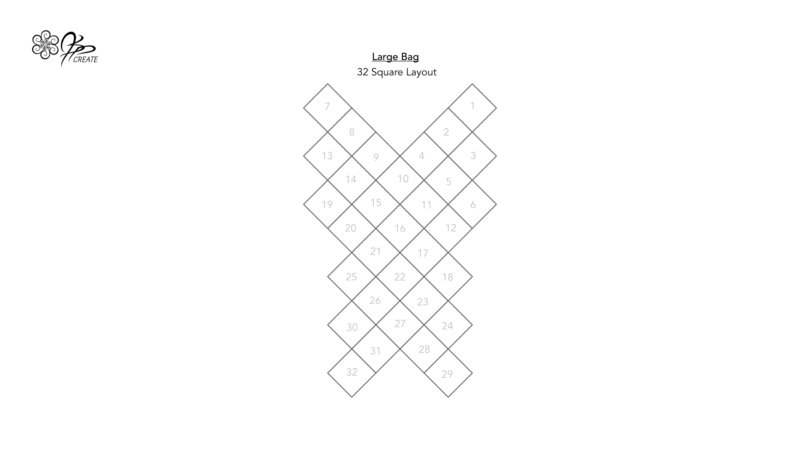
Layout Diagrams for Large Crochet Tote
If you are working the Large Tote, as I am in this sample, then you will use the Large Layout Diagram Below. The Large Tote calls for 32 squares. The Squares in the layout below are numbered from 1 to 32, in order of how I sew them.
As for the small layout, I find it easiest to sew the squares in strips first, and then sew the strips together to form one complete piece
Joining Your Squares
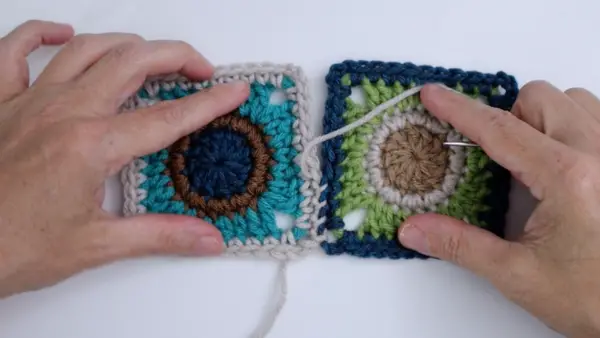
There are many methods you could use to join your squares. In my sample I used a simple whip stitch. This is a great stitch if you want the seam to blend in and not create any extra bulk. There are so many other methods. Another favourite of mine is the Single Crochet Join Technique, which creates a nice texture and lets you add more interest with colour. This is the technique I used in my Sand Banks Colour Way Tote in the full pattern.
Tutorials on How To Join Your Squares
Join Your Squares in Strips First
The Layouts above, have the squares numbered. I follow these numbers to join my squares FIRST into strips, Once they are all laid out in strips, then join the strips together to create one large piece.
Folding The Crochet Tote
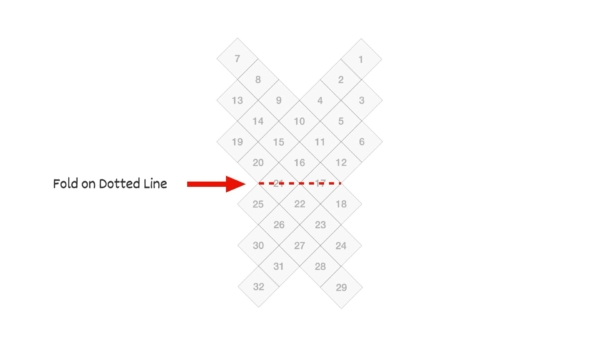
Once we have a complete piece, the next step will be to start folding our tote. This example uses our Large tote option. First we fold our crochet tote in half on squares 17 and 21.
Folding our Crochet Tote – Side Seams
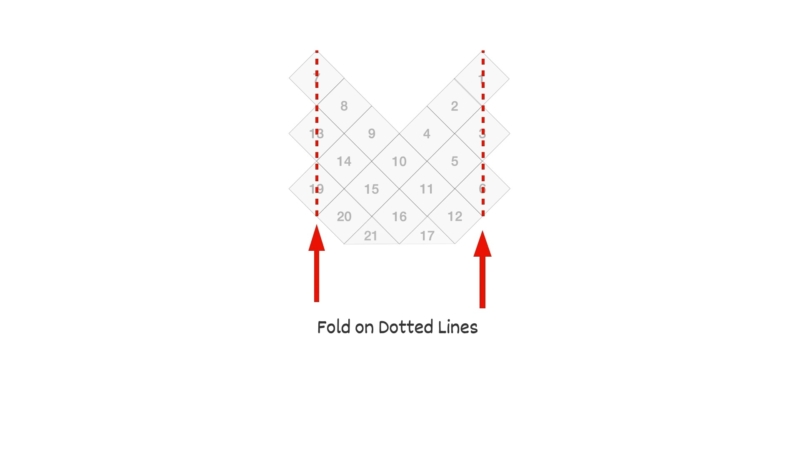
Once we have the crochet tote folded in half to create a front and back, we then want to fold our sides. Even though this method does not give you an actual side seam, these squares will be joined to create the sides, and will be sewn to the squares on the opposite side of the tote.
Adding our Shoulder Strap To The Crochet Tote
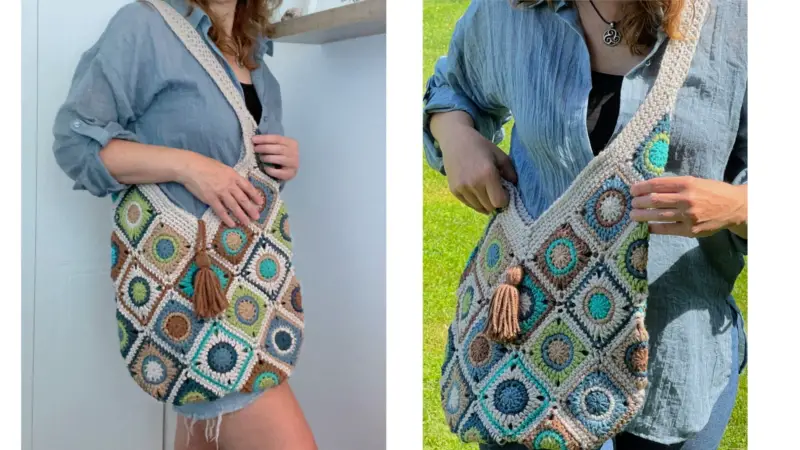
This crochet tote has one shoulder strap. This enables the wearer to use it as a cross body bag or just sling it over one shoulder.
First Half Of Strap
The shoulder strap is worked in two halves.
First you will create a foundation chain. The length of the chain will be the length that you would like the strap to be. I suggest 75 to 100 chains to give you a shoulder strap of 25″ to 35″. Of course this depends on your own crochet tension, so working out a simple single crochet gauge swatch is advisable.
I like my tote bag to rest on my hip, but you could make a much shorter one if you prefer. We all have different sizes and shapes of bodies so how you want the crochet tote to sit when you wear it is a personal preference.
It is best to lie the foundation chain down, stretching it slightly, as it will stretch when you wear it, and measure it to get the length that you prefer.
Once you are happy with the length of your foundation chain, turn and work single crochet across the length of it.
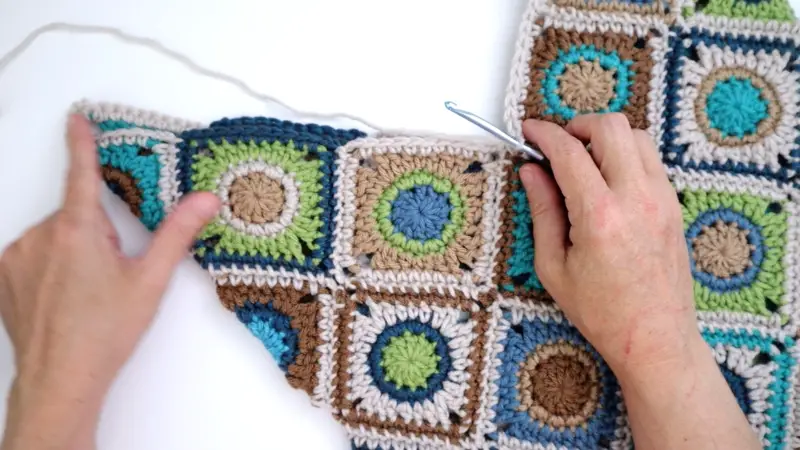
Now join your foundation chain at one of the top corners of the tote and then work single crochet stitches along the top edge of one side of the tote, working into each edge stitch and ch-3 sp from your square (or whatever your square edge has ).
When you reach the V shape at the center of your tote, work a sc dec over the center 3 sts, which will keep your edging lying flat and even.
Now you have completed your first round of single crochet for your strap. Work 3 more rounds of single crochet, keeping a sc dec at the center V of the tote on each rnd. Fasten off.
Second Half Of Strap
Join yarn in opposite loop of foundation chain and work single crochet across the bottom of the original foundation chain.
Continue to work as for first half of strap but working along the opposite top edge of your crochet tote.
If you want a wider strap, you can increase the number of rounds of single crochet on each half.
Finish Off The Crochet Tote
Now all that is left is to darn in your ends and gently block your crochet tote.
If you would like you can add a fastener in the form of a button or a tassel as I have done. You can also line your crochet tote with fabric.
Enjoy your beautifully handcrafted crochet tote. These are so fun and easy to make, you will be making them as gifts for everyone in your life!

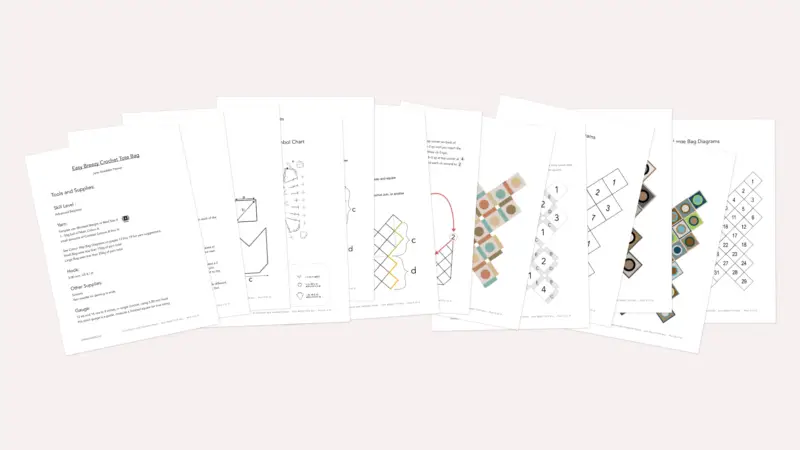
The full pattern for this Crochet Tote Bag, includes all the diagrams, layouts and multiple colour ways in a printable PDF form
If you would like a printable PDF of this pattern, you can purchase it in my Pattern Shop here:
JSPCREATE Pattern Shop: Easy Breezy Crochet Tote Pattern
Watch The Easy Breezy Crochet Tote Bag Tutorial
Thanks for joining me and getting creative.
“I found I could say things with color and shapes that I couldn’t say any other way – things I had no words for.” – Georgia O’Keeffe

