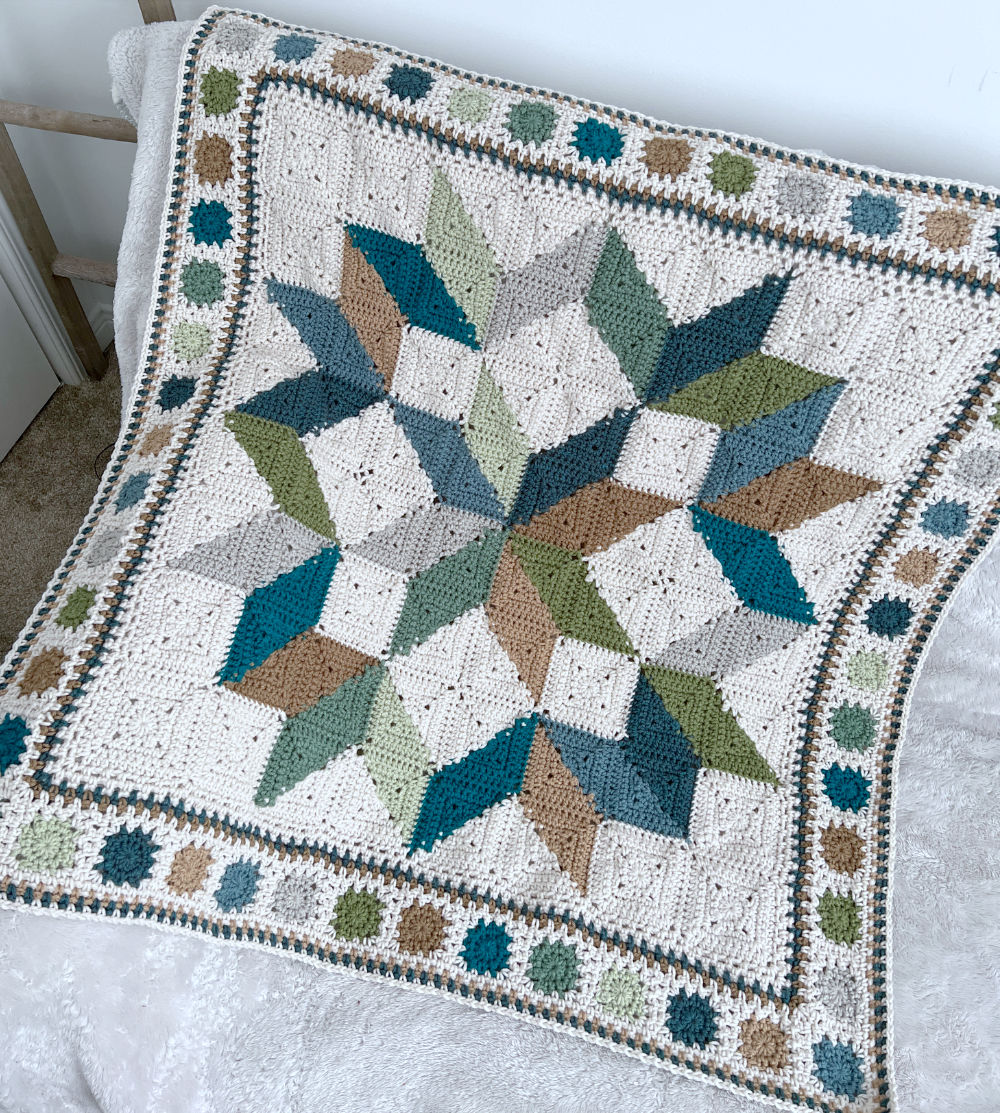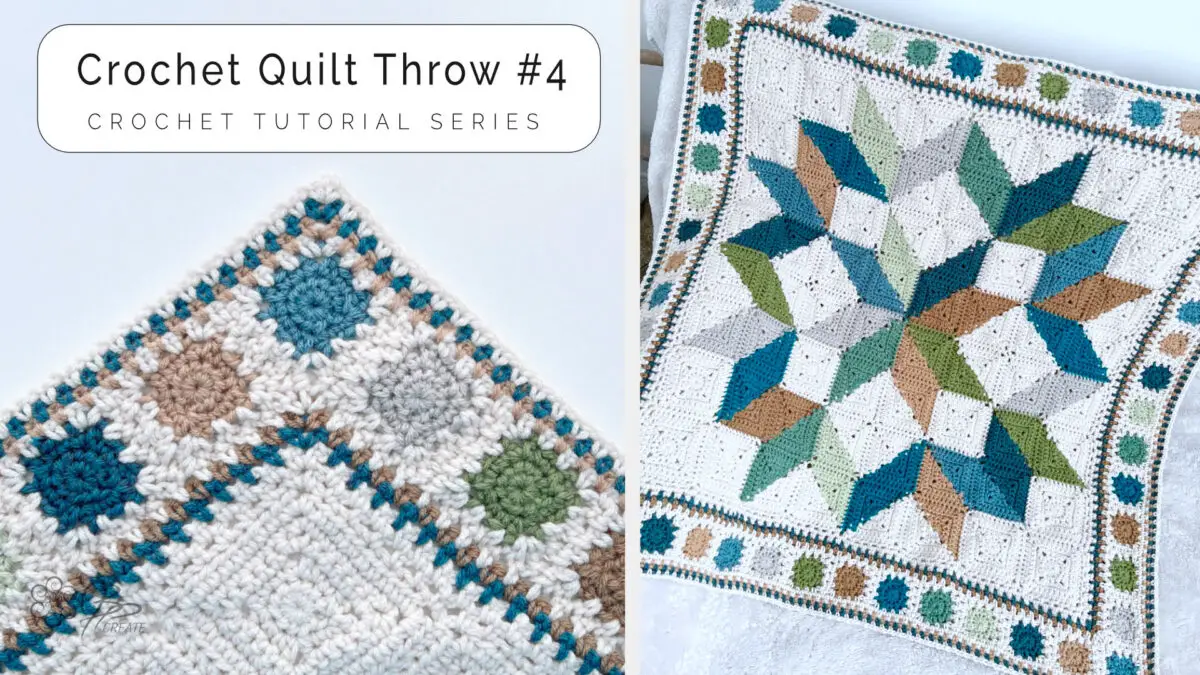
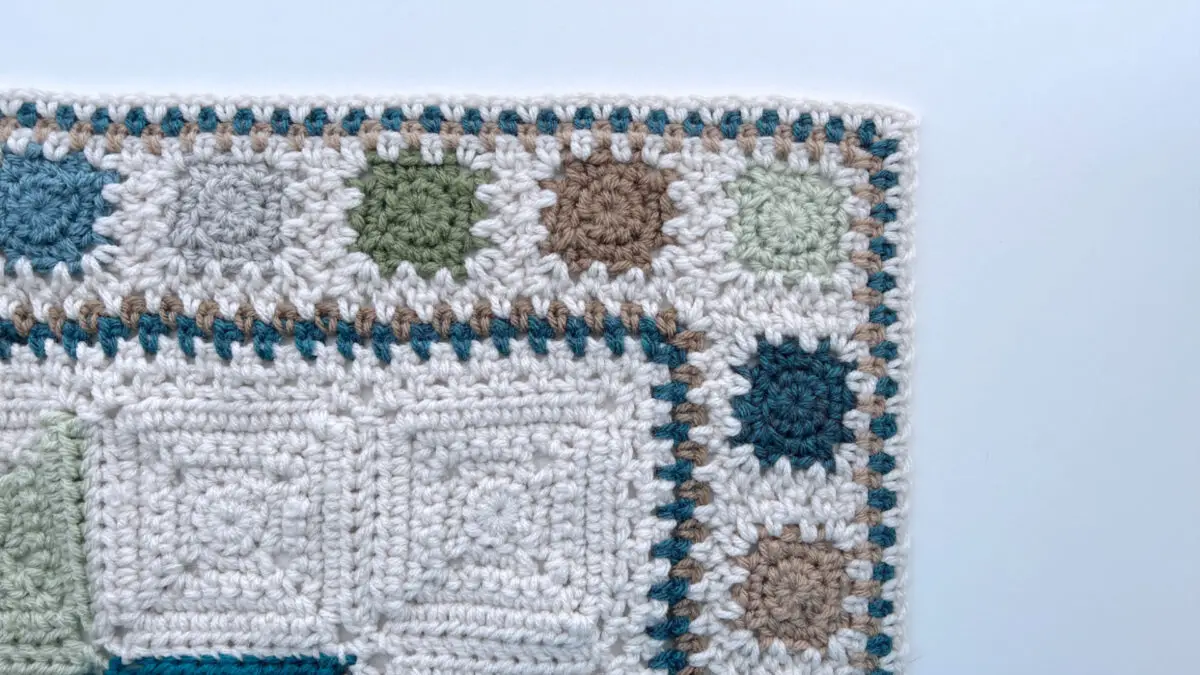
Today we get to add the Crochet Border to our Crochet Star Quilt Throw series ! These borders are divided into three sections, beautifully framing the central quilt star design we created in the first three videos.
If you haven’t watched those earlier videos yet, you can find them here:
Easy Back-and-Forth Square: Crochet Quilt Throw #1
Crochet a Two-Tone Square | Quilt Throw #2
Crochet Quilt Assembling Our Throw | Step 3
This tutorial is split into three parts for the crochet border that I have labeled border 1, 2 and 3.
Borders #1 and #3 feature a simple single crochet chain stitch pattern—one of my go-to techniques! I walk you through the basics and share my colour choices for that in my video below.
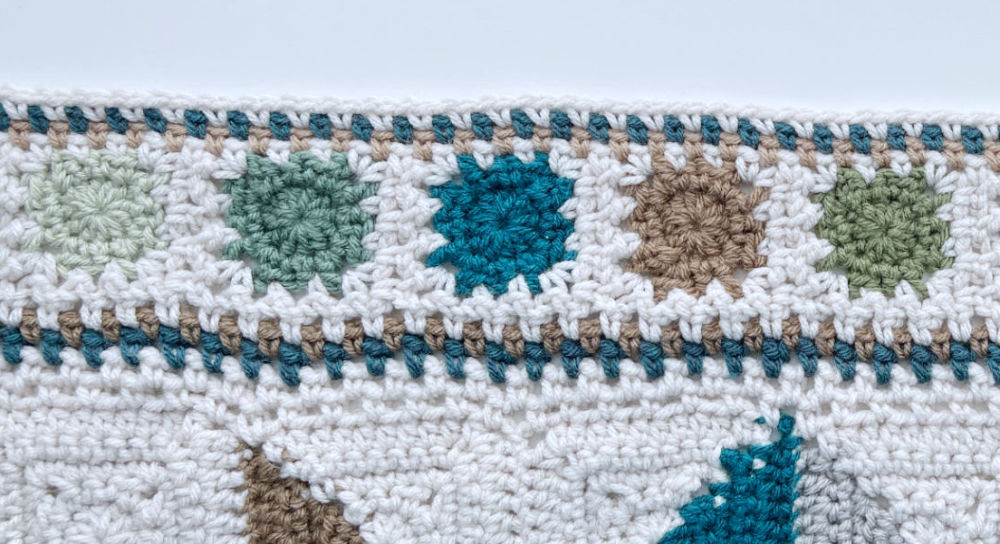
The middle section, Border #2, is where things get interesting! We’ll be using mini versions of our solid squares and joining them with a “join as you go” method to create a striking geometric effect. I’ll guide you through this part with step-by-step instructions also in the video below
And as with most of my technique tutorials, this border style isn’t just for this throw—you can easily use it on other blankets too! Let’s dive in.
Abbreviations:
ch – chain
st(s)– stitch(es)
sl st – slip stitch
sc – single crochet
hdc – half double crochet
dc – double crochet
lp(s) – loop(s)
yo– yarn over
rnd – round
beg – beginning
prev – previous
sp – space
sk – skip
rep – repeat
dec – decrease
Cont – continue
Col – Colour
More Information on Hooks Sizes, Yarn Weights and Crochet Language
Hook Sizes see the Craft Yarn Council’s Page Here
For Standard Yarn Weight Information See this Page
A Handy PDF from Annie’s on the difference between UK and US Crochet Terms
A Nice Explanation from LoveCraft’s on The UK and US differences
Tools and Supplies for Crochet Border
One of my Favourite Places to order yarn online is Mary Maxim Yarns – they carry a nice variety of colours and brands at affordable prices, and they also offer great coupons to inspire you to keep coming back for more, because can you really have too much yarn?
For this tutorial, I use all the colours in my throw, however you can put any colours you want in the border
Join the FREE Crochet Quilt Throw Series and get the Free Supply List Here
or get the Full PDF Pattern From My Shop HERE
Hooks:
Border 1: 5.50 mm US 9 / I
Border 2 – Small Square: 5.50 mm US 9 / I
Border 3 – Rnds 1 & 2 – 5.0 mm US 8 / H – Rnds 3 & 4 – 4.5 mm US 7 / G
My Favourite Hook is the Susan Bates Ergonomic Silvalume
Other Supplies:
- Scissors
- Yarn needle for darning in ends
Gauge and Finished Size
Border Square Rnds 1 – 2 = 2.0 inches / 5 cm with 5.5 mm hook
Crochet Border #1
With RS or Throw facing, Start in any of the 4 corners of the throw
Rnd 1: Join Col M with a sc in the corner square’s top right corner ch-2 sp, * [ ( ch 2, sk next st, sc in next st ) 5 times, ch 2, sc in next ch-2 sp, ch 2, sc in next ch-2 sp ( first corner of next square ) ] 7 times, then ( ch 2, sk next st, sc in next st ) 5 times, ch 2, ( sc, ch 2, sc ) into the corner ch-2 of last square of the edge, repeat from * across each of rem 3 edges of center piece, ending ch-2 before final corner, sc in final ch-2 sp, ch 2, sl st in first sc of rnd.
Rnd 2: Cont with Col M, sl st in next ch-2 sp, ch 1, sc in same ch-sp, ( ch 2, sc in next ch-sp ) across current edge to the next corner of throw, ( sc, ch 2, sc ) into the corner ch-2 sp, work as established for rem 3 edges and corners of throw, end with ch 2, sl st in first sc of rnd, fasten off.
Rnd 3: Join Col D with a sc in any corner ch-2 sp of prev rnd, ( ch 2, sc in next ch-sp ) rep between brackets ( ) across current edge to the next corner of throw, ( sc, ch 2, sc ) into the corner ch-2 sp, work as established for the rem 3 edges of throw, end with sc in final corner ch-2 sp, ch 2, sl st in first sc of rnd, fasten off
Rnd 4: Join Col H with a sc in any corner ch-2 sp of prev rnd, ( ch 1, sc in next ch-sp ) rep between brackets ( ) across current edge to the next corner of throw, ( sc, ch 2, sc ) in corner ch-2 sp, work as established for the remaining edges of throw , end with sc in corner ch-2 sp, ch 2, sl st in first sc of rnd, fasten off
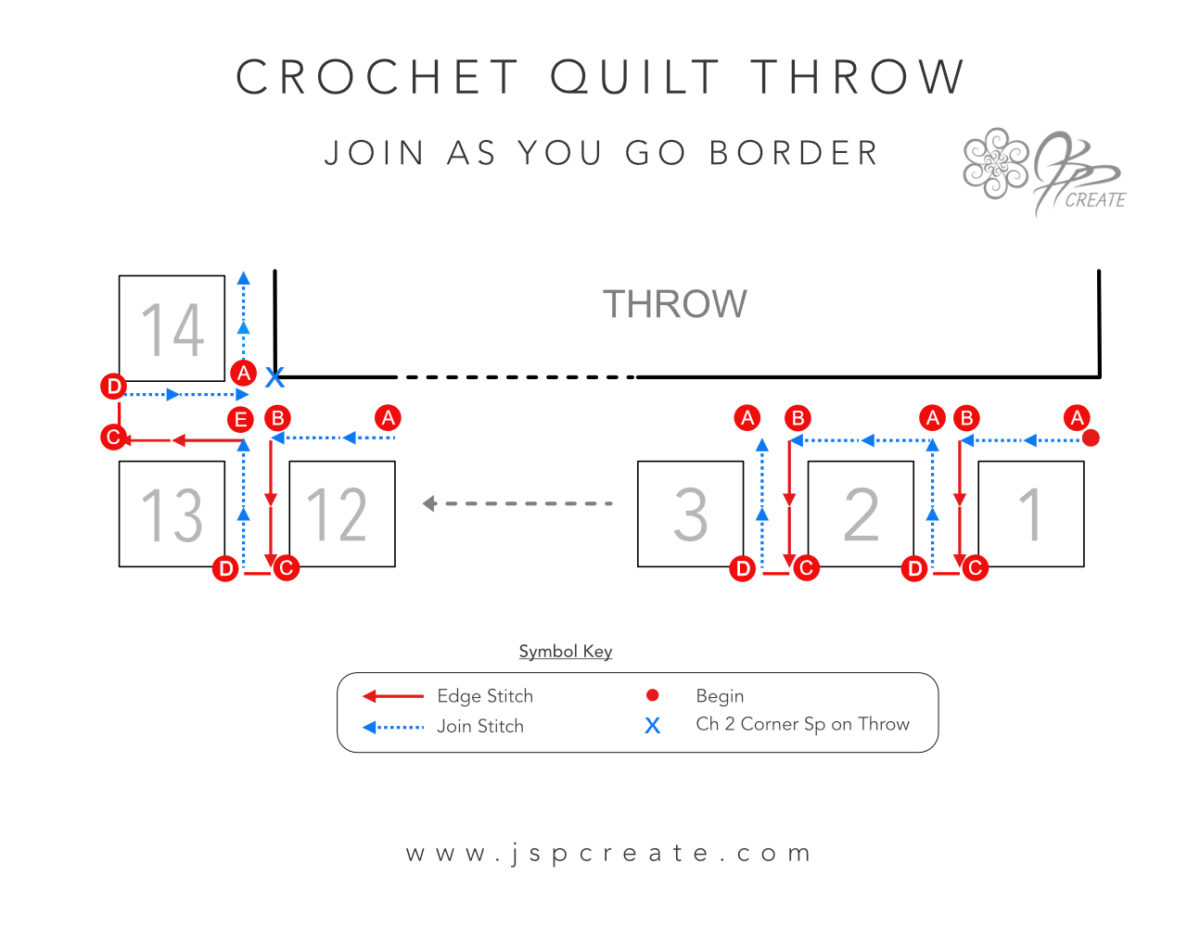
Crochet Border #2
This Border uses the JAYGO method. I have included a diagram below. This method is best worked through the video tutorial step by step along with me. See the Video Below
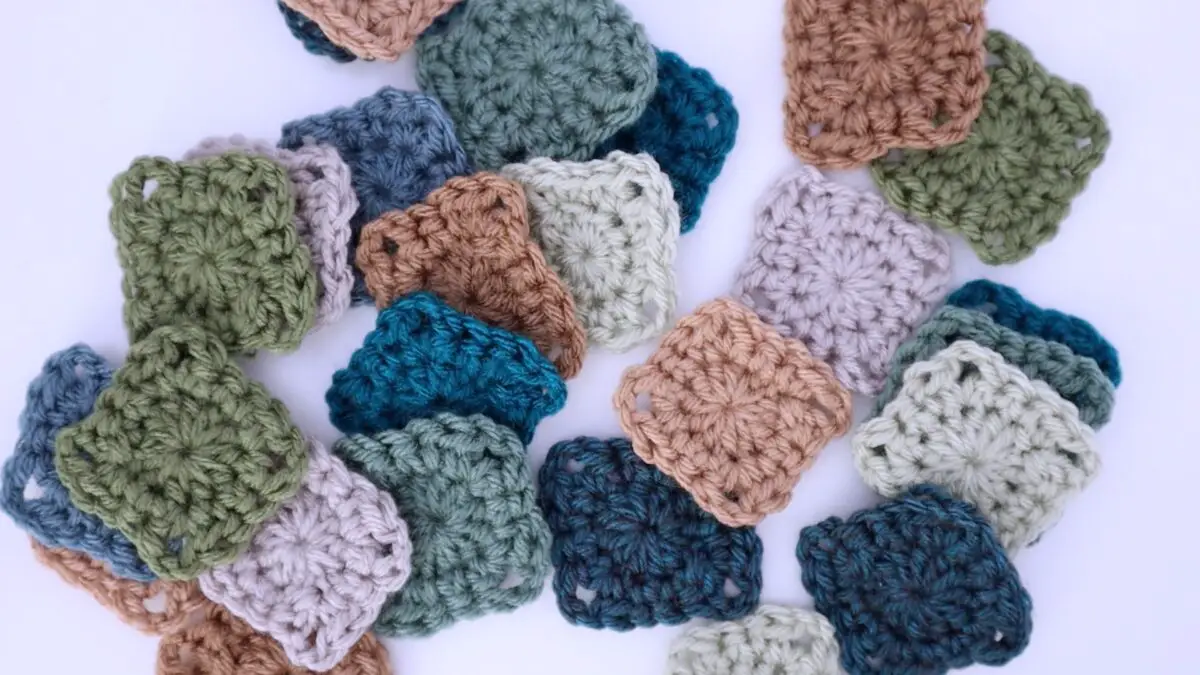
Make 52 of the Border Square as follows:
6 each of Col A, B, C, D, E, H, I, and 5 each of Col F, G
Border Square: Work as for Solid Square up to and including Rnd 2, fasten off.
Join the Squares Using the Join As You Go Method – See Video Tutorial below for instructions
Crochet Border #3
To prevent flaring of edges, I go down in hook size to a 5.0mm hook for Rnds 1 & 2 and a 4.50mm hook for Rnds 3 & 4. If you are a tight crocheter you may want to use the original 5.5mm hook that was used for the main body.
With RS or Throw facing, Start in any one of the 4 corners of the Throw
Rnd 1: Join Col M with a sl st in first squares’s top right corner ch-2 sp, ch 1, sc in same sp as join, * ( ch 1, sc in next ch-1 sp ) 10 times, ch 1, sc in next ch-2 sp, ch 1, sc in ch- sp created when you joined the squares, ch 1, sc in the next ch-2 sp, rep from * across this edge, until you reach the next corner of the throw, instead of working a sc in this corner, work ( sc, ch 2, sc ) into the ch-2 corner, rep from *,
Work as established around the remaining 3 edges of the throw, until you reach the ch-2 corner you joined in, sc in this same ch-2 sp, ch 2, sl st in first sc of rnd, fasten off.
Rnd 2: Join Col C in any ch-2 sp corner sp of last rnd, ch 1, sc in same sp as join, ( ch 1, sc in next ch-1 sp ) across entire edge to the next ch-2 sp corner, ( sc, ch 2, sc ) into this ch-2 sp, work as established for the remaining edges of throw until you return to the ch-2 sp you joined in, sc in ch-2 sp, ch 2, sl st in first sc of rnd, fasten off.
Rnd 3: Join Col D with a sl st in any ch-2 corner sp of last rnd, Rep Rnd 2
Rnd 4: Join Col M with a sl st in any ch-2 corner sp of last rnd, Rep Rnd 2
Walk Through All of the Crochet Border – Step By Step
Check out my Shop where I regularly release new patterns using all my squares.
All shop patterns include a symbol chart version of the square as well as various colour way diagrams
Thanks for joining me and getting creative. ~ Jane ~
“I found I could say things with colour and shapes that I couldn’t say any other way – things I had no words for.” – Georgia O’Keeffe
Get The Full PDF Pattern in my Shop