Up next in 10

https://www.jspcreate.com/diy-yarn-sample-cards-stash-organizing-magic/
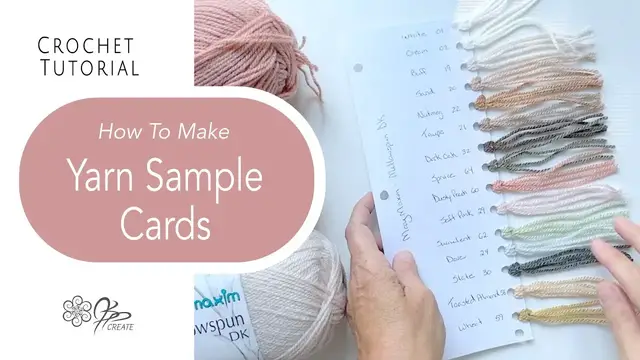
Make your own yarn sample cards to organize and keep track of your yarn stash in this easy how to video walkthrough
How to wind a yarn ball by hand
https://youtu.be/YkTG8WZL8Cg?si=DnQw9NW2Cs8JBR1c
contains affiliate links at no cost to you
contains affiliate links at no cost to you
Find more Classes from me over on Skillshare https://www.skillshare.com/en/r/user/jspcreate?gr_tch_ref=on
Website
https://www.jspcreate.com
Facebook
https://www.facebook.com/jspcreate.crochets
Instagram
Show More Show Less View Video Transcript
0:00
Hey gang! Jane back with a fun little organizational tutorial for your yarn stash
0:05
Today I'm going to show you how to make your very own yarn sample cards to keep track of
0:09
your own stash and to help with choosing yarns for your next project. All you're going to need
0:14
are a few simple office supplies that you probably already have on hand
0:19
A while back when I owned my own yarn store, one of my favourite packages to receive from
0:23
my yarn suppliers was the binders of yarn sample cards. These were so much fun to flip through and
0:29
they were great tools for designing and working out new colour palettes for projects. These days
0:35
I make my own yarn sample cards based on what I have in my stash and the yarns I like to use often
0:41
This makes it so much easier for me to see at a glance the colours I'd like to work with and the
0:46
information about the yarn weight, the yardage, hook suggestions, gauge, and it lets me compare
0:51
colours to see what I'd like to use. And if I'm out of something, it lets me know what the colour
0:56
name and number is so I can order more. The other reason I love these sample cards is because when
1:01
my yarn gets messy and labels get lost, which is on the daily around here, it helps me identify
1:08
some of my poor lost balls of yarn. In addition to being really useful, these yarn cards are simple
1:14
and fun to make. Let's get started. So what are we going to need for today? Just basic office supplies
1:22
So I have here a pair of scissors, paper scissors. I don't use my crochet scissors because you are
1:28
going to be cutting either cardstock or regular paper. We need some magic tape, a ruler of some
1:34
sort, a pencil, a punch is handy. So I have a single punch here. These are easy to pick up at
1:42
the dollar store. I do have a three hole punch that I had used. I'm not sure where that is right
1:47
now, so the single punch will work. You don't need a punch if you don't want to because we can use
1:52
scissors to poke holes, but the punch is neater. A pen and some regular eight and a half by eleven
2:01
paper. So I have used cardstock because I had some in the house. It holds up well, so that's why I was
2:09
using it. But you can use regular printer paper. I'll show you how to do that because when I ran
2:14
out of cardstock, I started to use printer paper and it worked just as well. Oh, and you're going
2:19
to need a three ring binder as well. Any three ring binder will work. It depends on how much
2:23
yarn you have as to how big of a binder you want. So you can build these up slowly. You don't have
2:28
to have every color right off the bat, but as you buy more yarn, you can add it to your library of
2:36
yarn. So leave space for it. I often have about two of these cards per brand of yarn if there's
2:44
a lot of colors in the yarn. So I always make sure there's space for that. So let's get started making
2:48
the card and then I'm going to show you how I start to add the yarn. So first we want to start
2:54
out with our eight and a half by eleven piece of paper, whether it's cardstock. Now if it's a heavy
3:00
cardstock, you're just going to want to cut it in half right down the center because you don't need
3:06
to be doing this step unless it's a thinner piece. This is just regular printer paper, so it's kind
3:11
of thin. So to give it a little extra strength, I folded it over lengthwise, matching those corners
3:20
so that they're even, and then just crease it along this edge. And that would be if you cut your card
3:28
stock in half. But when I ran out of cardstock, I thought, well, instead of buying more, let me just
3:32
use printer paper. It's what I had on hand and it works really well. So now I just use this. So I
3:38
now have my printer paper folded in half lengthwise, and I'm going to put this edge, the open edge here
3:50
I'm going to put that one against the the rings of the binder. So if you don't have a three hole
3:55
punch, which will figure out all these calculations for you, and you only have the single hole punch
4:00
or you don't have one at all, you'll have to figure out where you want the holes. So what I do is I
4:05
lie it on my binder and I make it even on each side, right where the three hole punch would
4:10
probably put it itself. And then I just mark where the rings are. Mark so you've got them
4:19
placed. So I have little pencil marks at each of the ring positions. So we'll take one that we've
4:25
already done just to show you for an example. See how it fits just perfect? That's great with the
4:31
three holes. And what I want to know is how far in these holes are going to be. So I put the holes
4:38
in, let's use my trusty measuring device, and I'm going to go to about the center of the hole. So I'm
4:45
looking, of course, it's not perfect. So the edge of the hole we're going to say is half an inch
4:53
Let's do half an inch. So you want to go half an inch in, right along in here. I use the straight
5:04
line on my ruler to line up with this flat edge so that I know I'm perpendicular. And I go half
5:10
inch in right where I made that mark. This will be the edge of the hole, the center, but the inner
5:17
edge of the hole. So then I'm going to go along and do the same thing on each of the other ones
5:21
So half an inch in. And now we're going to place our hole. So take your punch and see how I've got
5:28
that mark right there. You might not be able to see very clearly on this camera. And I'm going to take
5:33
my punch and line it up. And it's not going to be in the center. It's going to be at the outer edge
5:39
of the ring. So put it, put your punch in like this. I'm going to show you how this is going to work
5:44
And see how the mark is on the inner edge of that ring. Now go ahead and do that for the other two
5:50
holes. So now is where we cross our fingers and hope that it worked. So let's see if it slides on
5:56
Perfect! Slides right on. So that's how I figure out how to do that with just a single hole
6:02
If you don't even have the punch, just use your scissors and poke a hole through the paper
6:09
It'll be a little bit rougher around the edges, but it'll work. So now that we have it to fit our binder
6:15
we're going to start working this way. So I'm going to keep this binder here because I'm working on a
6:22
white background with a white sheet of paper. All right, I've moved my white onto a different
6:27
background because white on white was not working. So let's now continue with our white sheet of
6:33
paper on our colored background. So now the next step we're going to do is putting our holes for
6:40
our yarn. So in this case, I went a little crazy and I wanted a whole bunch of them. So I put 16
6:45
in here, but I wouldn't put them any closer because the closer they get, the weaker your
6:50
paper is going to get and they're going to rip in between. You also want them to be in far enough
6:56
that you can make just a nice knot, but you're not going to yank it out because it's going to that you can make just a nice knot, but you're not going to yank it out because if you pull on these
7:03
too tight, they literally will rip. But then because they're made of normal paper, you can
7:08
make lots more. So let's take our ruler and make some dots again where we're going to punch. And
7:17
this time we need the single punch. This is where a three hole punch is not going to do the trick
7:22
for you. This is a eight and a half by 11 paper, so it's 11 inches long. I'm going to do one hole
7:27
every inch and that will give me 11 holes because I'm going to put the first one half an inch in
7:35
from the side. So I literally put my ruler here so I can understand that. So I'm going to go half an
7:41
inch to the one inch mark and I'm just going to put a dot kind of in there somewhere. We'll line
7:46
those up after. Right now we're just making sure we do the spacing. So we're going to go a full inch
7:53
with these ones, depending on how many you want. Remember, you can always make lots of cards, so
7:58
you don't necessarily want to jam them up. I do put mine very close together
8:05
So that's up to you how close you put them, but I wouldn't put them any closer than three
8:09
quarters of an inch together because again, you don't want to mess around with the structure of
8:15
the paper and you don't want them ripping. So I now have a dot every full inch. I've counted half
8:23
an inch in to start every full inch and I end up half an inch from the bottom. So now I want to line
8:31
them up from the edge. So I want to go in. Let's see what I did here because this kind of worked well
8:38
I'm an inch person. So the inside edge, as I did for the other one, is half an inch in. You could
8:46
go even further, but remember the further in you go, the bigger this part of it, the knot will be
8:53
So half an inch is plenty. So let's go back in here and all I'm going to do is go half an inch
9:01
half an inch. And again, you're using a pencil so you can erase it if it bothers you. Half an inch
9:07
in. Let's just line it up with that hole. And then I'm going to go half an inch at the bottom
9:14
line it up with the one down here. There. And then maybe somewhere in the middle, just to ensure that I get the line straight
9:27
And then you're going to line up your half inch marks. So I have three of them here. I'm going to
9:34
line them up with the ruler. And I'm going to put a very light line. Actually put it in the bottom
9:45
here. So now I'm going to put a very light line across
9:55
And that's going to be the edge of where I punch. So I'm going to zoom in and see if you can see this better. So I've made it very light so that
10:04
I can erase it. And I'm going to use my punch and line the edge of the hole up with this line
10:14
right where those dots are. So let's start here up at the top. And I'll do my first one. So I'm
10:21
going to go in here and I'm going to line it up with this. And that's going to be the center here
10:29
And it's also going to be the edge here. So you see how I've got that centered here and the edge
10:38
here. So I'm not really paying attention to the first dot I made. It's in there. As long as it
10:43
in the circle, that's what matters. And then go ahead and punch it. Okay, it didn't quite come up to the edge. So I know I can come in a little further. So let's
10:55
try another one and I'm going to move in a little bit. Those are close. Oh, that one's a little
11:00
further out too. That's okay. You kind of learn how your punch works the more you use it. So that
11:06
one is closer to the line. They're going to be a little bit crooked. But once I get my yarn on
11:10
there, you're not going to notice. So go ahead and keep punching down your card. And when you're done that, we'll move on to the next step. Okay, I have done all the holes. And I even took my
11:19
little trusty little eraser here and got rid of the line that I had drawn all the way down
11:25
Not that it matters. I just like to get rid of that. And that's why I did it in pencil. So now
11:31
we have our first card ready. So before you fill this card, if you think you want more
11:37
it's great to use this one now as a template. So you would go ahead and fold another piece of paper
11:44
put this one over top of it, and then just punch through the holes. And you don't have to do any
11:50
more of the measuring. So I would make a few of these before you get started. And that way you
11:56
have them in reserve and always have one extra or you'll have to go back and do the measuring thing
12:01
again. So it's always good to have one and make a whole bunch of them. And then you don't have to
12:06
worry when you come back and have a new brand of yarn and you want to use it, you already have a
12:10
card ready and waiting without having to do that measuring again. So now what's the next step on
12:16
our card? Well, before we start putting our yarn on it, we want to put a name on it. In this case
12:24
I'm using the Mary Maxxum Mellow Spun DK. I would turn my card so that the three hole punch will be
12:30
in the binder part. You want it so that you can see it as you flip. I put my name across this way
12:37
Now you can do it differently. You can do it down this way. What I like is because I have my color
12:43
names across here, I put the yarn name across here. Now I used to put all the information across here
12:49
as well, but it gets very crowded. So I'll show you what I do instead of that. So I would write my
12:57
name and I would just use my ruler and I would write using my pen, which I've lost. I would use
13:06
my pen and I would write the name of the yarn across the top. So I'm one of those ruler writers
13:13
because I like it to be straight, but you can just freehand it. So I would write Mary
13:23
Maxxum. Mellow Spun. And this name across the top is just so that at a glance I can tell what yarn I'm looking at
13:40
Put ends on my bottoms there. There we go. So this one is going to be Mary Maxxum Mellow Spun
13:47
And I already have one, but I'm just using it as an example. And then I will start to add the colors
13:53
But here's the thing. Instead of writing all the information here, I'm going to flip this over. So
13:58
this will be the back of the card. So when you're looking at the cards in the binder, when you flip
14:03
it, this will be on the back. And I'm going to take a label of one of the balls of yarn. So this is how
14:11
the yarn comes. I'm going to take one of my labels and I'm going to tape it to the back. So it's a
14:19
little long. They often will be. So I'm just going to cut it off where the information ends
14:26
I used to try to write all this information on the card, but I realized the label has so much more
14:32
And even if I had to cut the label in half, just so I have the information parts
14:37
So by doing this, I have the yards, the acrylic, it's 100% acrylic, the actual name. They do change
14:45
the look of their labels, but the information is important. What else do I have on here? I have the
14:50
care instructions. I have the gauge information, what weight it is. And I even have this little
14:58
QR code at the bottom that I can go find it online. So of course the yarn label is going to be
15:04
bumpy because it came off of a round ball and that's where your tape comes in handy. So any
15:09
tape will work. I like to use this magic tape and I'm just going to secure it at the top up here
15:16
Across there. And then I'm going to secure it again at the bottom. So pull it straight
15:23
And down here at the bottom, I'll put another piece. And it still wants to jump up. So I'm going to tape it down the sides
15:33
And I can tape it all the way down the sides, but that might be overkill
15:38
So we'll just tape it in a few spots here. I don't want to interfere with these holes
15:44
Do not tape over top of those holes. And then I'm going to tape down here because it really wants
15:50
to roll. The other thing you can do instead of having all this tape issue, although it does keep
15:54
it from flipping around, you could just press the label for in a book for a day or two, and it'll be
16:00
nice and flat. So there we have my label on the back of the yarn card. So when I'm looking at my
16:07
yarn and I see the name and I think, what weight is that? Although it says DK right there, but what
16:13
do I want? How many ball or how many yards are in a ball? What size are the balls? I flip it over and
16:18
I have all the information right here. Now we're ready to add our yarn. And there's a few different
16:24
ways you can approach this. You can just add the yarn as you get the balls of yarn and just write
16:30
the name in and do your little strand. Or you can go to the yarn website and you can look at how
16:36
many different colors there are and you can write them in ahead of time, anticipating that you're
16:42
going to get one of each at some point. That's an idea. That's only if you're going to use a lot of
16:48
the colors because some of the colors you'll probably never use, right? Maybe they're not in
16:52
your color palette, but you could just write the ones you know you will use. So if you add them as
16:58
you get the yarn, it'll kind of be hither thither and that's okay too. It depends on how you like to
17:03
see things. I like them to be somewhat in the right color ranges. So this either involves I go ahead
17:09
and look at the yarn colors already on the website, add them in, and then as I buy those balls of yarn
17:15
I add them to the card. Or I make a new card after I've already got a bunch of yarn. So I have done
17:22
that before where my yarn colors are all mixed up. Or they've added a new batch of colors that I really
17:28
like and they don't really, they should be somewhere next to something else so I can do some color
17:33
designing with them. And that's when I make a whole new card because quite honestly these are cheap and
17:38
easy to make. So making a whole new card sometimes is necessary especially if you use them a lot and
17:44
they end up pulling out of their paper. Like I have had a few of them rip out. So it's up to you how you
17:51
add your colors. So we'll take one that I've already done here and take a look at it. So what I do is I
17:57
write in the color name and I like to write the color number as well. Just so when I'm looking at
18:03
it online or I'm ordering sometimes they go by color number and you want to know what the number
18:07
is, it's handy to have in there as well. How do I put the yarn on here is your next question. So I take
18:14
my yarn and one of, like I said, one of the reasons I love this is because when the labels fall off and
18:18
they get messy and I do like to wind mine into little cakes. I have a tutorial on that on my
18:24
website and on my YouTube on how I wind these by hand. But once I do that now the label's gone and
18:31
it is really hard to tuck the label in there. So this is one of the key reasons I love these yarn
18:36
cards because if I have a ball of yarn that I'm like, I don't remember what that is, I can actually
18:41
look at it and although your dye lots might be off a little, you can really tell which yarn it is by
18:48
putting it over top. So this one in particular is here and what I would do is I would pull out a nice
18:54
length of yarn. So let me just tell you for the numbers people, the strands I like ending up being
19:03
is about four inches. If it's much longer than that it's going to hang outside the binder and
19:08
then that gets really messy. I also like to have about, see there's four strands here, which means
19:15
that I have two strands done with a knot. So if I want them to be four inches, two strands, so I'm
19:22
going to say about, just to be safe, let's go two 12 inch pieces. So literally the length of my ruler
19:31
So I just take the yarn, measure it down my ruler, that's one strand, use my scissors to cut it
19:39
and then make a second strand the same length, just by mimicking what I already have here
19:46
And now I have two 12 inch strands of the yarn. It's just a sample off your ball, it doesn't use
19:52
very much and it's so worth it to have these colors to look back at. So if I were to add this to my new
19:58
card, I would write the name and it's on the label, it's actually on the label that I just used here
20:04
so it's slate and they give me this long code, but the first four digits are the same no matter
20:08
what color. So I just use the last two digits to identify because the less numbers the less
20:14
confusing. So I would write slate 30, which is the color, the end of the color number
20:21
and then I'm going to put it on my card. So how do we put it on our card? So you take your two
20:27
strands, hold them together and then fold them in half like this. So this loopy part at the top
20:35
is going to go through your hole, so squeeze it together and push it through that hole, oops
20:44
of course it doesn't want to go, and pull it up. So you want to make sure your ends are still
20:50
generally, this is why you use a little bit extra because your ends are not going to be even
20:55
but as long as they're close. Now holding this loop with my finger, we're going to zoom in
21:00
So here we have the loop in my finger and the cut ends underneath the card. So I pulled the loop
21:07
up from the bottom to the top, then you're going to stick those cut ends through the loop
21:14
like that, and then you're going to let go of the loop and gently pull the ends
21:22
gently, because if you pull too hard, you will pull right through this paper no matter how strong
21:28
it is. So you just gently, so it's secure, but it is, it's just like making a piece of fringe
21:36
They're literally pieces of fringe on the edge of your crochet work. So you can go ahead and add all
21:41
of those and then trim them at the end, or you can trim them as you go. So like I said, I want
21:47
mine to be about four inches. So from the top of the knot down, there's the four inch mark right
21:57
there. So I will just trim across and there we go. We've got our first one added to our card
22:06
and we can just write in the name, Salate, and the color number was 30
22:14
And there we go. We have a sample of one of our yarns and now you can continue down and when you
22:20
fill up your card, you make another card or you use another card. Hopefully you've made some of
22:24
these already so that you don't have to do all that measuring part again. And then when you're
22:29
done, you're going to have a whole binder of these and when you go design or you have these loose
22:34
balls that have lost their labels, you'll be able to identify what that color is. It's really handy
22:40
It's really handy too if you just want to take a look at the yarn and say, I'm looking for a pale pink and maybe I have a few brands of yarn and I go through and I say
22:51
which one works best because I mix up my yarn brands all the time. It's kind of what I do
22:57
I love scrap busting by buying lots of colors. Thanks so much for joining me today. I hope you
23:03
had fun and will be making your own binder of yarn sample cards to keep a record of your stash
23:09
Remember, if you enjoyed this tutorial, please hit the subscribe button and you'll be notified
23:13
of all the new tutorials as they come out. And again, you can find more about this tutorial
23:18
over on my website. Check for the link in the description below. Enjoy and I'll see you next time
#Packaging
#Hobbies & Leisure
#Crafts
#Fiber & Textile Arts
#Art & Craft Supplies